



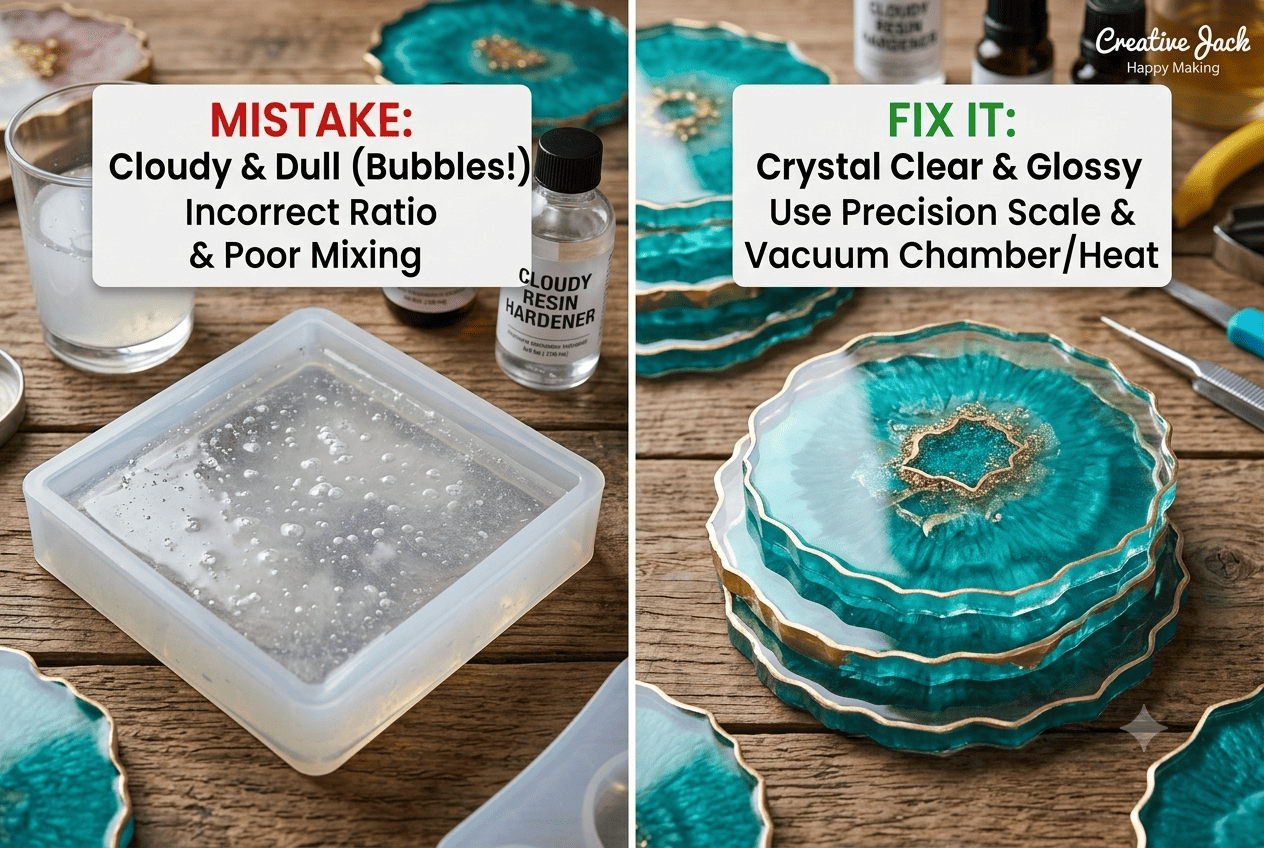
Common Resin Art Mistakes Beginners Make (And How to Fix Them)
Common Resin Art Mistakes Beginners Make (And How to Fix Them)
The most common resin art mistakes — sticky surfaces, cloudy finishes, muddy colours, surface bubbles, and uneven curing — are all preventable. Almost every resin art problem traces back to one of four root causes: incorrect mixing, wrong temperature or humidity, unsafe or unsuitable materials, or skipping preparation steps. Once you understand the cause, the fix is straightforward.
This guide covers the 12 most common resin art mistakes beginners in India make, why they happen, and exactly how to prevent them.
In This Guide, You'll Learn:
-
The 12 most common resin art mistakes and their root causes
-
Exactly how to fix each problem
-
Which mistakes are preventable and which can be corrected after the fact
-
How to troubleshoot future problems confidently
-
Why learning in a supervised studio eliminates most of these mistakes entirely
Why Resin Art Mistakes Are So Common — And So Costly
Resin art looks effortless online. The tutorials show smooth pours, perfect colour swirls, and flawless glossy finishes. What they don't show is the failed pour before that one. Or the sticky piece that had to be binned. Or the batch of ten coasters where the colour went muddy.
Resin is both forgiving in its aesthetic possibilities and unforgiving in its technical requirements. Get the chemistry right and you can create almost anything. Get it wrong and no amount of creativity saves the piece.
The good news: every mistake in this guide is either preventable with the right knowledge, or fixable with the right response. Let's go through them.
Mistake 1: Sticky or Tacky Surface After Curing
What it looks like: The surface of your piece feels sticky, soft, or rubbery hours or days after pouring — sometimes even after 48+ hours.
Why it happens:
-
Incorrect mixing ratio — the most common cause. Even a small deviation from the specified ratio (say, 1:1.2 instead of 1:1) leaves excess resin or hardener that cannot react, producing a permanently soft layer
-
Insufficient mixing time — resin mixed for 60 seconds instead of the required 3–5 minutes leaves unmixed components
-
Contaminated mixing cups — residue from a previous batch or other chemicals interfering with the cure
-
Room temperature too low — epoxy resin cures slowly below 20°C and may remain tacky if the workspace is cold
How to fix it: You cannot fully fix a tacky cure — the chemistry is already set. However:
-
If caught early (within a few hours), try moving the piece to a warmer room (25–28°C) and covering it. Some pieces recover with heat.
-
For persistent tackiness, lightly sand the surface once it's as hard as it's going to get, and pour a fresh, correctly mixed thin layer on top. This can save coasters and flat pieces.
-
The real fix is prevention: measure precisely, mix thoroughly for the full recommended time, use the two-cup transfer method, and keep your workspace warm.
Mistake 2: Resin Didn't Cure at All (Remains Liquid)
What it looks like: Hours after pouring, the resin is still liquid or has only partially gelled.
Why it happens:
-
Severely incorrect ratio — significantly more resin than hardener (or vice versa) can prevent any curing
-
Resin poured at very low temperatures (below 18°C) — the curing reaction slows dramatically in cold conditions
-
Contaminated hardener — hardener that has absorbed moisture from air exposure over time loses effectiveness
How to fix it:
-
If still liquid: carefully scoop out as much liquid resin as possible and dispose of safely. Once the workspace is clean, pour a correctly mixed fresh batch.
-
Prevention: store resin and hardener in sealed containers in a cool, dark place. Always check expiry dates. Measure accurately and work in a room above 22°C.
Mistake 3: Surface Bubbles That Won't Go Away
What it looks like: Hundreds of tiny bubbles on or just below the surface of your finished piece, visible once cured.
Why it happens:
-
Stirring too aggressively — fast stirring whips air into the mixture
-
Not using a torch or heat gun to pop surface bubbles after pouring
-
Torch pass happening too late — if you wait more than 10–15 minutes after pouring, resin begins to thicken and bubbles can no longer escape
-
Cold resin — low-temperature resin is thicker and traps bubbles more easily
How to fix it:
-
Stir slowly and deliberately — think of folding batter, not whisking eggs
-
Let mixed resin rest for 1–2 minutes after mixing to allow bubbles from mixing to rise
-
Do your torch or heat gun pass within 5 minutes of pouring, and do a second pass 5–10 minutes later as new bubbles surface
-
Warm your resin to 30–35°C before mixing (place the sealed bottles in warm water for 10 minutes) — warmer resin is thinner and releases bubbles more easily
-
For a finished piece with surface bubbles: sand with 400-grit wet/dry paper and pour a thin clear coat on top
Mistake 4: Colours Turn Muddy or Brown
What it looks like: You mixed what should be a vibrant blue and white — and the result is a flat, dull grey-brown.
Why it happens:
-
Mixing complementary or opposing colours directly into each other (blue + orange = brown; purple + yellow = brown)
-
Over-mixing colours once they're in the mould — once colours are poured, less is more
-
Using too many different pigments that, combined, produce a neutral muddy tone
-
Acrylic paint added in too high a quantity — the water content in acrylic affects colour vibrancy in resin
How to fix it:
-
Understand basic colour theory before you pour: colours opposite on the colour wheel will neutralise each other. Keep your palette to 2–3 colours plus white or black.
-
When swirling colours in the mould, use gentle, deliberate movements. Stop before you think you need to.
-
Use separate mixing cups for each colour and add them to the mould without pre-mixing them together.
-
For jewellery and small pieces where muddy colour is irreversible: sand and re-pour. For coasters with partial muddy areas: embrace the imperfection or consider it a learning sample.
Mistake 5: Resin Yellowing After Curing
What it looks like: A piece that looked crystal clear or white when poured turns yellow, amber, or cream-coloured within weeks or months.
Why it happens:
-
Using a resin not formulated for UV resistance — low-quality or general-purpose resin yellows rapidly when exposed to light
-
Prolonged exposure to direct sunlight without a UV-protective finish
-
Some hardeners naturally yellow faster than others
How to fix it:
-
Prevention is the only real solution: always use UV-resistant resin (check the product description — most quality brands specify this)
-
Apply a UV-protective topcoat spray to finished pieces, especially those that will be displayed near windows
-
Store cured pieces away from direct sunlight
-
In Mumbai, where natural light is intense year-round, UV protection is especially important
Mistake 6: Uneven Surface (Fish Eyes, Craters, or Pitting)
What it looks like: Random circular depressions, craters, or holes in the surface of cured resin.
Why it happens:
-
Silicone contamination — silicone from tools, moulds, or skincare products on hands disrupts resin surface tension and causes fish-eye craters
-
Dust or debris falling onto the wet surface during curing
-
Oil or moisture on the pouring surface
-
Water in pigments — moisture disrupts surface tension
How to fix it:
-
Never use silicone-based tools (silicone spatulas or mixing sticks) that have also been used with silicone oil — keep your tools separate
-
Wash and dry hands thoroughly even when wearing gloves — skin oils can transfer through glove contact to tools and surfaces
-
Cover your piece with an inverted cardboard box immediately after pouring — dust is one of the most common causes of surface defects
-
If you discover craters after curing: sand the surface lightly and pour a fresh thin coat on top
Mistake 7: Resin Overheating and Cracking in the Cup
What it looks like: Mixed resin in your cup becomes very hot to the touch, starts smoking, or cracks and fractures as it solidifies.
Why it happens:
-
Too much resin mixed at once in a narrow, deep container
-
The exothermic (heat-generating) curing reaction has nowhere to dissipate and builds up dangerously
-
This is most common when beginners mix 500ml or more of resin in a narrow tall cup
How to fix it:
-
Use wide, shallow containers for larger volumes of mixed resin — the greater surface area allows heat to escape
-
Never mix more resin than you need for a single pour
-
If your cup feels uncomfortably hot: move it away from flammable materials immediately and allow it to cure in a ventilated area. Do not pour from an overheating cup — the accelerated cure will cause serious surface problems.
-
Work in smaller batches and mix multiple smaller quantities if a large volume is needed
Mistake 8: Resin Sticks to the Mould and Won't Release
What it looks like: Your piece cures well but tears, distorts, or refuses to release from the mould.
Why it happens:
-
Using the wrong mould material — resin releases from silicone cleanly, but will bond permanently to plastic, cardboard, fabric, and most other materials without a release agent
-
Demoulding before the piece is fully cured
-
Very thin or delicate pieces that flex and stick on release
How to fix it:
-
Always use silicone moulds for best results — resin peels off silicone without release agents
-
Wait the full curing time before demoulding — for most standard kits, 24 hours is minimum
-
Flex the silicone mould gently from the outside, working around all edges before applying pressure from the back to push the piece out
-
If using non-silicone moulds (e.g., wooden frames): apply a thin coat of paste wax or petroleum jelly as a release agent before pouring
Mistake 9: Inclusions Floating or Sinking to the Bottom
What it looks like: Pressed flowers or other inclusions you placed carefully in your pour migrate to the bottom, float to the top, or move completely out of position during curing.
Why it happens:
-
Dense inclusions (stones, crystals, metal pieces) sink in liquid resin
-
Very light inclusions (dried petals, glitter) float upward
-
Resin is still fully liquid when inclusions are placed — there's nothing to hold them in position
How to fix it:
-
Use the layering technique: pour a base layer, allow it to partially cure until it reaches a thick, gel-like consistency (2–4 hours depending on resin brand), then place inclusions and pour a top layer over them. The partially cured base holds inclusions in position.
-
For items you want at the bottom: place them before pouring. For items you want in the middle: use the partial cure method. For items at the top: place on a thin, nearly-cured final layer.
Mistake 10: Amine Blush (Greasy Surface Film)
What it looks like: A waxy, greasy, or milky film on the surface of cured resin — particularly common in Mumbai and other high-humidity locations.
Why it happens:
-
Amine blush is caused by the amine components in the hardener reacting with moisture and CO₂ in very humid air during curing
-
Particularly common during Mumbai's monsoon season (June–September) when humidity regularly exceeds 80%
How to fix it:
-
Work in air-conditioned spaces or with a dehumidifier running during monsoon months
-
Wipe the surface of the fully cured piece with a damp cloth, then dry thoroughly — amine blush is water-soluble and wipes away cleanly in most cases
-
If the next layer won't bond: lightly sand and wipe again before pouring
Mistake 11: Drips on the Underside of Poured Pieces
What it looks like: After pouring on an open surface (canvas, wooden panel), resin drips over the edges and hangs as stalactites on the underside, curing there.
Why it happens:
-
Using too much resin for the surface area
-
Not checking and wiping the underside during curing
-
Pouring directly onto an elevated surface without drip protection
How to fix it:
-
Elevate your pouring surface on cups or small supports before you begin, so you can reach the underside
-
Check the edges and underside every 15–20 minutes during the first hour of curing, and wipe drips with a gloved finger or cloth
-
Once cured: sand underside drips smooth with coarse sandpaper (80–120 grit), progress to finer grits (400), and seal with a thin resin coat if needed
Mistake 12: Skipping Safety Equipment
What it looks like: Working without gloves, without a respirator, in a closed room — and developing skin reactions, headaches, or worsening chemical sensitivity over time.
Why it happens:
-
Underestimating the chemical nature of uncured resin
-
Believing "low odour" resin is safe without a mask
-
Not wanting to invest in proper safety equipment
Why this is the most serious mistake: Resin sensitisation is cumulative and irreversible. Each unprotected exposure increases sensitivity. Many people work without protection for months or years before developing a significant reaction — at which point they may no longer be able to work with resin at all.
The fix is simple: Nitrile gloves, organic vapour respirator, and adequate ventilation — every single session without exception. These items cost less than ₹1,500 total. Your long-term ability to do this craft is worth far more.
How Creative Jack Eliminates These Mistakes From Day One
At Creative Jack's Resin Art Course in Mumbai, none of the above mistakes happen in isolation — because instructors are watching your technique in real time and correcting issues before they result in a failed piece.
The studio is set up with correct ventilation, quality materials with accurate mixing ratios, and proper safety equipment provided for every student. You learn:
-
Exactly how to measure and mix for your specific resin brand
-
How to read your resin's working time and adjust to your pace
-
The correct torch technique — demonstrated, then supervised as you practise
-
How to troubleshoot problems as they arise, not after the piece has cured wrong
Students who learn at Creative Jack leave with troubleshooting knowledge they carry into every future session — which means their home practice produces quality results from the start.
FAQs About Resin Art Mistakes
Can a sticky resin piece be saved? Sometimes. If caught early, moving to a warmer environment helps. For pieces that have fully cured sticky, sanding and re-pouring a fresh top coat can save flat pieces like coasters. Jewellery and intricate mould pieces usually need to be remade.
Why do my resin colours always turn out duller than in tutorials? Tutorials often use professional-grade pigment powders with high mica content. Cheap or low-concentration pigments produce flat, dull colours. Invest in quality pigments — you need very little per pour so even premium powders last a long time.
How do I stop dust getting into my curing resin? Cover your poured pieces with an inverted cardboard box or a large plastic container immediately after pouring. Keep the cover on for at least 12 hours — longer if your environment is dusty.
My resin has gone cloudy — what happened? Cloudiness is usually caused by moisture contamination (wet tools, high humidity during mixing), incorrect mixing, or cold resin. Ensure tools are completely dry, work in a room with humidity below 70%, and mix thoroughly at the correct temperature.
Is there a way to fix yellowed resin? Not directly. Once resin has yellowed, the discolouration is in the cured material and cannot be reversed. Apply a UV-protective topcoat to slow further yellowing, or repour over the top with UV-resistant resin for a clear cover layer.
Want to Avoid These Mistakes From the Start?
The fastest way to bypass the expensive learning curve of resin art mistakes is to learn in a structured, supervised environment where instructors can correct technique before it becomes a problem.
Creative Jack's Resin Art Course in Mumbai gives you that — with all materials provided, safety built in, and certified instructors watching your technique from your very first pour.
Chat with our team on WhatsApp : +91 83560 65552
Explore More at Creative Jack
Creative Jack — India's Creative Learning Hub. Art and design classes across Mumbai and Pune, for all ages and skill levels.