


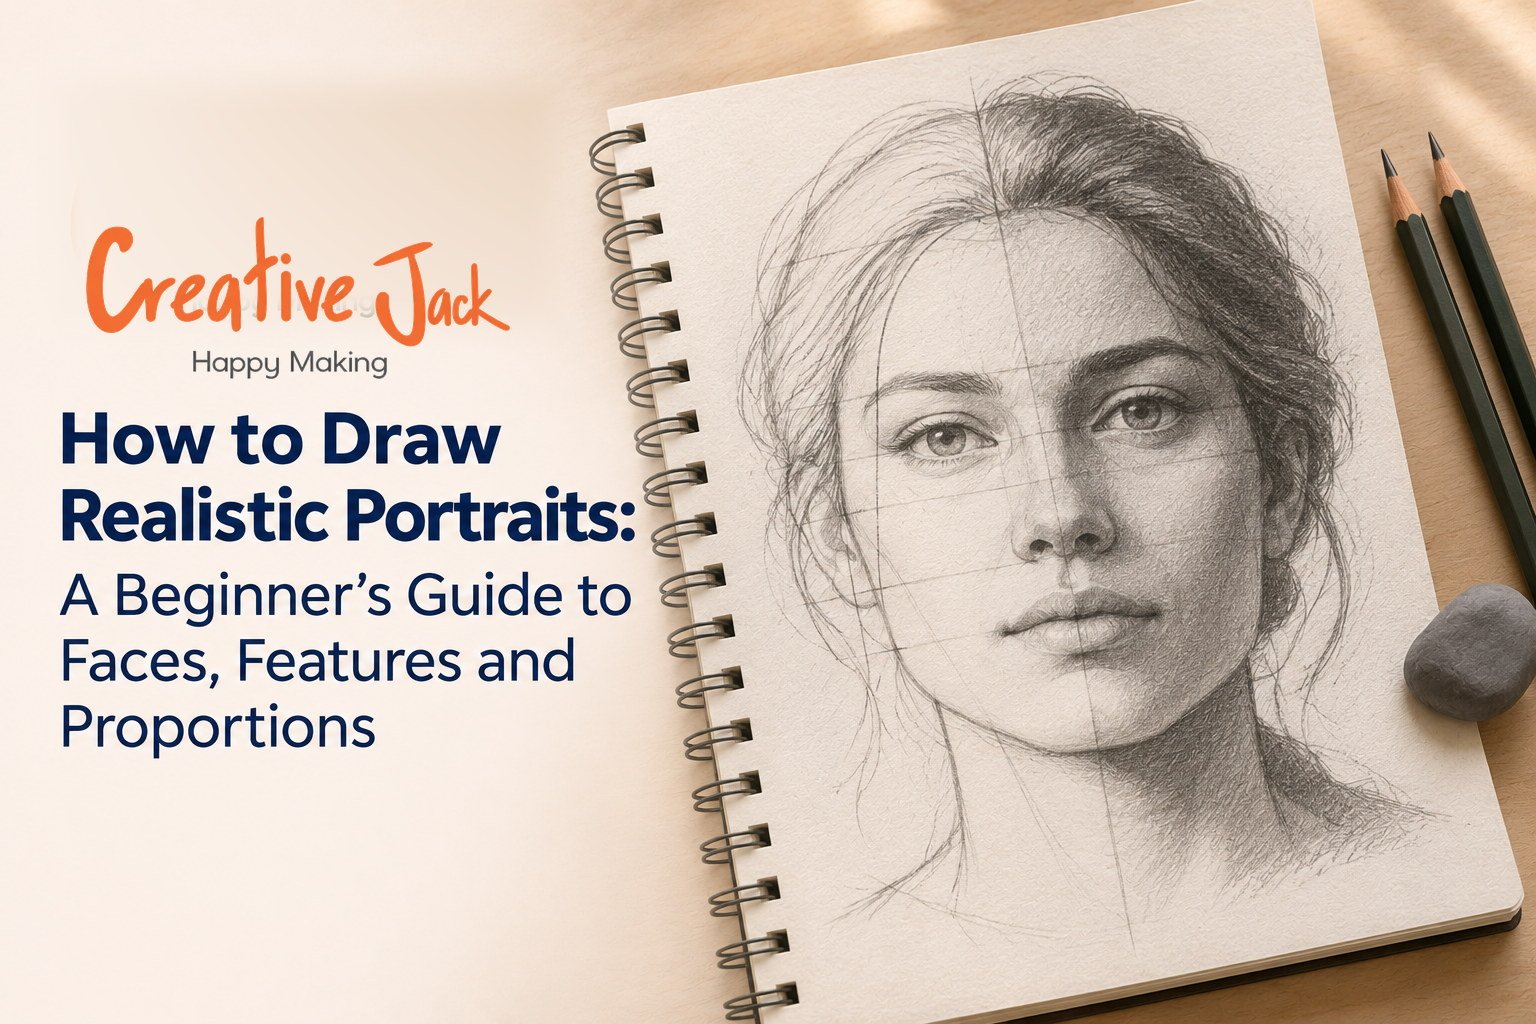
How to Draw Realistic Portraits: A Beginner’s Guide to Faces, Features and Proportions
To draw a realistic portrait, start with the head shape and a few guidelines, place the features using simple proportion rules, then build tone slowly with a soft pencil. In a front view, the eyes sit about halfway down the head, the nose ends about halfway between the eyes and the chin, and the mouth sits about a third of the way from the nose to the chin. Get those placements right before you draw a single eyelash and the face will look believable.
What You'll Find in This Guide
• Why faces feel so hard, and what actually goes wrong
• The proportion rules that place every feature
• How to draw eyes, nose, lips, and ears, one at a time
• How to handle hair and skin tone
• A step-by-step method you can follow for a first portrait
• The mistakes that make portraits look "off"
Why Faces Feel So Hard
If you are searching for how to draw a face, realistic portrait drawing, or portrait drawing for beginners, you are not alone. Faces are the subject most people want to draw and the one they find hardest.
We are experts at reading faces. A shift of a millimetre in the eyes or mouth changes the expression and the likeness, and we notice immediately even if we cannot say why. That sensitivity makes portraits unforgiving, and it is why a beginner's first face often looks strange.
The good news is that most "off" faces come from the same handful of problems: features placed too high, eyes drawn too small or too close, and a head that is too narrow. Once you know the rules for placement, much of the strangeness disappears.
Before You Start: Materials and Reference
You do not need much. A few graphite pencils (HB, 2B, 4B, and optionally 6B), an eraser, a blending stump, and smooth-to-medium paper are enough. If you are unsure about pencils, our guide to drawing pencil types explains which ones to use.
Choose a clear reference photo, ideally with soft, directional light and a face looking straight at the camera. Photos with strong shadows or tilted heads are harder. Print it if you can, so you can draw lines on it and measure.
Basic Face Proportions for a Front-Facing Head
These are guidelines, not laws. Real faces vary, but the rules give you a reliable starting point.
1. The head is an egg shape. Draw an oval, slightly wider at the top and narrowing towards the chin. The head is roughly one and a half times as tall as it is wide.
2. The eye line is halfway. Draw a horizontal line across the middle of the oval. This is where the eyes sit. Beginners almost always place the eyes too high, because hair adds height and tricks us into thinking the forehead is shorter than it is.
3. The head is about five eyes wide. Divide the eye line into five equal parts. The eyes take the second and fourth parts, with one eye-width of space between them.
4. The face divides into thirds. The distance from the hairline to the brow, the brow to the bottom of the nose, and the bottom of the nose to the chin are each roughly one third.
5. The nose ends about halfway between the eyes and the chin. The width of the nose is about the distance between the inner corners of the eyes.
6. The mouth sits about a third of the way from the nose to the chin. The corners of the mouth roughly line up with the centre of the pupils when looking straight ahead.
7. The ears sit between the brow line and the base of the nose. Draw them lightly to start.
Draw these as faint construction lines. You will erase most of them later.
What About Profiles and Three-Quarter Views?
In a side view, the ear sits roughly in the middle of the head, and the head is nearly as deep as it is tall. A popular way to build this is the Loomis method, where you start with a circle for the skull, slice off the sides, and attach a jaw. It is a helpful system for angled heads because it keeps the head three-dimensional. In a three-quarter view, the features on the far side become narrower, and the centre line of the face curves around the form.
Start with front views. Move to angles once those feel comfortable.
Step-by-Step: Drawing a Portrait
Step 1: Block In the Head
Lightly draw the oval, then add the centre line down the face and the eye line across it. Draw the jaw and chin more precisely. Keep everything pale.
Step 2: Place the Features
Getting the layout right matters more than drawing facial features well, because even beautifully drawn features look wrong in the wrong place.
Using the proportions above, mark the position of the eyes, the bottom of the nose, the mouth line, and the ears. Check them against your reference. Squint at both and compare. If something looks off, fix it now. It is much easier to move a guideline than a finished eye.
Step 3: Draw the Eyes
Start with the overall almond shape of each eye, then add the iris. The upper eyelid usually covers a bit of the top of the iris, so you rarely see the full circle. Draw the pupil, then leave a small highlight. Add the shadow the upper lid casts on the eyeball, and the crease above the eye. Do not outline every eyelash. Suggest them with a few strokes at the edge.
A useful trick: draw both eyes together, going back and forth, rather than finishing one before starting the other. It keeps them matched in size and angle.
Step 4: Draw the Nose
Noses are mostly shadow, not line. Draw the nostrils and the underside, then shade the side of the nose away from the light. Keep the bridge very subtle. A heavy outline makes the nose look pinned on.
Step 5: Draw the Lips
Begin with the line where the lips meet, since that is the darkest and most important line. Then shape the upper and lower lips around it. The upper lip is usually in shadow and a bit darker than the lower. Avoid a hard outline around the lips. Soft edges look more natural.
Step 6: Add the Ears and Hairline
Keep the ears simple. They are a curved shape with a few inner folds. For the hairline, draw it softly and avoid a hard edge where the forehead meets the hair.
Step 7: Build the Skin Tone
Build tone gradually, using layers rather than pressure. Look for the large shapes of light and shadow: the shadow under the brow, under the nose, under the lips, under the chin, and along the side of the face away from the light. Keep the lightest areas, such as the forehead and cheekbones, almost untouched. For help with building tone, see our guide to seven shading techniques.
Step 8: Draw the Hair as Shapes
Don't draw every strand. Look at hair as masses of light and dark. Block in the overall shape, then shade the darker sections, then add a few lines that follow the direction the hair flows. Leave highlights where light catches it.
Step 9: Step Back and Refine
Look at your portrait from a distance, or hold up a mirror to it. Adjust the darkest darks and lightest lights. Soften edges that look too sharp, and sharpen the ones that matter, such as around the eyes.
Common Portrait Mistakes
Eyes too high. Check the halfway line.
Eyes too small. Beginners draw them smaller than reality. Measure against the head width.
The head too narrow. Many beginners forget the back of the skull. The cranium takes up more room than you expect.
Outlining everything. Faces are made of tone, not lines. Use soft transitions.
Drawing symbols. Drawing an "eye" instead of the eye in front of you. Observe the actual shapes.
Rushing the details. Eyes and lips are tempting, but the underlying structure is what gives likeness.
Dark outlines on the nose and lips. Use shading and soft edges instead.
You will find more of these, with fixes, in 10 common drawing mistakes beginners make.
A Short Practice Routine for Portrait Skills
Do not try to master the whole face at once. Practise the parts.
• Week 1: Draw ten eyes. Different angles, different lighting.
• Week 2: Draw ten noses, concentrating on shadow shapes.
• Week 3: Draw ten mouths.
• Week 4: Put it together in one full portrait. A quick portrait sketching session of 15 minutes each week is also a good warm-up.
Compare your week one and week four eyes. You will see the difference.
When to Get Help
Drawing realistic portraits benefits enormously from feedback. A teacher can spot at a glance that your eyes are a few millimetres off, which is hard to see yourself because you have stared at your drawing for so long. If you are thinking about lessons, our guide to choosing portrait drawing classes lists what to check.
See Portraits Take Shape
It is very helpful to watch a portrait develop. Free demonstrations are on the Creative Jack YouTube channel, and you can see student portraits on our Instagram.
How Creative Jack Teaches Portraits
Creative Jack has a Pencil Drawing course focused on realism portrait drawing, which you can find under the Pencil Drawing category. Our beginner-level Professional Art Course also teaches anatomy sketching and charcoal work, including portraits, along with light and shadow. The Professional Art Course is designed for beginners, and we are happy to tell you which course suits your level.
FAQs
What is the easiest way to start drawing a face? Begin with the oval head shape and the guidelines for the eye line, nose, and mouth. Place the features before adding detail.
Where should the eyes go on a face? About halfway down the head, not near the top. Beginners often place them too high.
How do I draw realistic eyes? Draw the almond shape, add the iris partly covered by the upper lid, then shade around it and add a small highlight.
Why do my portraits look flat? Usually because the tone range is too narrow. Build a clear range from light to dark, and avoid heavy outlines.
Is it better to draw from a photo or from life? Photos are easier for beginners because they do not move. Drawing from life is excellent practice once you have more confidence.
How long does it take to learn portraits? Basic likenesses can come within a few months of regular practice. Detailed realism takes longer. See how long it takes to learn drawing and sketching.
What pencils do I need for portraits? HB, 2B, 4B, and optionally a 6B for dark areas, plus a blending stump and a kneaded eraser.
Portrait Practice in Mumbai, Navi Mumbai, Thane, and Pune
If you are looking for in-person help, our Professional Art Course is listed at Art Station Andheri West, Khar West, CBD Belapur, and FC Road Pune, and at Mango Stationery in Thane West. Ask about batches for the Pencil Drawing course when you enquire.
Want Feedback on Your Portraits?
Book a free trial class or message us on WhatsApp.
Related reads: 7 Shading Techniques Every Beginner Artist Should Learn | Portrait Drawing Classes Near Me | 10 Common Drawing Mistakes Beginners Make