


Resin Art for Beginners: Complete Guide to Getting Started
What Is Resin Art? A Complete Beginner's Guide (2026)
Introduction
Resin art has become one of the most popular creative hobbies in India. From colourful coasters and jewellery to stunning wall art, epoxy resin allows beginners to create professional-looking pieces without advanced painting skills. In this guide, you'll learn what resin art is, the materials you'll need, safety precautions, and how to create your first resin artwork.
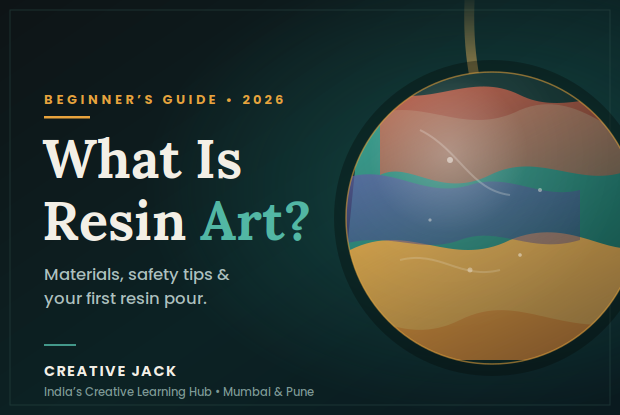
What Is Resin Art?This refers to a form of artistic creations made from epoxy resin, which is an adhesive liquid material known for giving an artistic work a transparent and glassy look when dried up. In the making of resin art, artists combine the resin material with different colors, pigments, and even decorations to come up with their unique creations, including abstract paintings and jewelry among others.
In This Guide, You'll Learn:
-
What resin art actually is and how it works
-
The exact tools and materials you need to start
-
Common beginner mistakes and how to avoid them
-
A step-by-step process for your first resin pour
-
How to learn resin art the right way in Mumbai
Now let’s understand Resin Art.
Step 1: Understand What Resin Art Actually Is
Epoxy resin consists of two parts: resin and hardener. When mixed together they chemically react and that reaction creates heat (called an exothermic reaction) and over 24–72 hours, the liquid cures into a hard, clear, glossy solid.
There are two main types used in art:
Casting Resin which has a lower viscosity, suitable for mould filling, jewellery creation, coasters and three-dimensional objects.
Coating Resin which is thicker in consistency, is typically applied to flat surfaces such as canvas, wood panels, and tabletops.
As a beginner, you'll most likely start with coating resin on a flat surface or casting resin in silicone moulds.
Step 2: Get the Right Materials (And Skip What You Don't Need)
You don't need a massive kit to start. Here's what actually matters:
The Essentials:
-
Epoxy resin + hardener (a trusted brand, correctly measured).
-
Silicone mixing cups and stir sticks.
-
Nitrile or disposable surgical gloves (non-negotiable since resin is a skin sensitiser).
-
A respirator mask rated for organic vapours.
-
Pigment powders, alcohol inks, or acrylic paints for colour.
-
A heat gun or small torch for popping surface bubbles.
-
A flat, level surface to work on.
-
A dust cover (a cardboard box works just fine while the piece cures).
What you can skip for now:
-
Expensive pigment sets (start with 3–4 colours).
-
UV resin kits (different process, not ideal for learning).
-
Glitter and inclusions (add these once you understand flow and curing).
Where to source in Mumbai and Pune : You can find all the resin art materials easily in Art Station stores in Andheri , Khar and Belapur in Mumbai and near FC college and NIBM in Pune as well as their online store.
Step 3: Set Up Your Workspace Safely
This step is non-negotiable and skipped far too often.
Uncured resin releases volatile organic compounds (VOCs). Working in a closed room without ventilation is genuinely harmful,not just unpleasant.
Before you pour:
-
Work in a well-ventilated space or near an open window
-
Wear your gloves from the moment you open any resin container
-
Put down a silicone mat or plastic sheet - resin sticks to everything
-
Ensure your surface is completely level (use a spirit level if you have)
-
Keep your workspace between 24-28°C for best curing results -Mumbai and Pune's climate is actually ideal for resin work during most of the year
Step 4: Mix Your Resin Correctly
This is where most beginner pieces go wrong.
The ratio between resin and hardener must be exact - even a small deviation causes the piece to remain sticky or not cure at all.
The process:
-
Measure resin and hardener separately by volume (or weight, depending on your brand's instructions).
-
Combine them in a clean silicone cup.
-
Stir slowly for a full 3-5 minutes, scraping the sides and bottom as you go.
-
Avoid whipping the mixture - this introduces air bubbles.
-
Let it rest for 1-2 minutes before adding colour.
If you notice the mixture is cloudy after stirring, keep going, it will turn clear when properly mixed.
Step 5: Add Colour and Pour
Now’s the fun part, but keep it simple on your first attempt.
For a beginner swirl or fluid pour:
-
Divide your mixed resin into 3-4 small cups
-
Add a small amount of pigment or alcohol ink to each (less than you think — resin colour is concentrated)
-
Pour each colour onto your prepared surface in thin streams, alternating colours
-
Use a stir stick, skewer, or gloved finger to gently swirl and manipulate
-
Tilt the surface slowly to spread resin to the edges
For coasters using moulds:
-
Pour a clear base layer first
-
Let it partially set (around 2-3 hours)
-
Add your colour layer on top for a layered effect
Use your torch or heat gun on low, held about 10 cm above the surface, to pop bubbles. Move it in slow, sweeping motions - don't hold it in one spot.
Step 6: Let It Cure- Don't Rush This Part
Cover your piece with a dust-free cover and leave it undisturbed.
-
Tack-free (surface dry): 8–12 hours
-
Fully cured and hard: 24–72 hours depending on your resin brand and ambient temperature
Resist touching or moving the piece during this time. The most common reason a resin piece gets ruined is impatience.
After full cure, you can sand edges, add another layer for depth, or seal with a UV-protective topcoat to prevent yellowing over time.
Why Most Beginners Struggle with Resin Art
Resin art looks effortless online - those swirling colours, the glass-like finish, the jewel tones catching the light and the sparkling galaxy, what a sight! So most beginners buy a kit, watch a few YouTube videos, and dive in.
And then the results don't match the expectations.
It turns yellow. It is ruined by bubbles. The colors blend to form brown. The project does not cure well. Even worse, they may not know about the dangers of uncured resin fumes because there is no ventilation.
Sound familiar?
The problem isn't you. The problem is that resin art has a technical side that no aesthetic Instagram reel or a youtube video ever shows you and without structured guidance, trial and error gets expensive fast. And here is where we come in.
FAQs About Resin Art for Beginners
Q : Is resin art safe to do at home?
A : It can be, with the right precautions. You need proper ventilation, nitrile or surgical gloves, and a respirator mask. Never work in a closed room. If you're unsure about safe handling, learning in a supervised studio environment is the better option to start.
Q : How expensive is it to start resin art?
A : A basic beginner’s kit consists of resin, hardener, some pigments, gloves, and moulds typically costs between ₹1,500 and ₹3,000 in India. Waste from trial and error can add up quickly without guidance, which is one reason many beginners find a structured course more cost-effective in the long run.
Q: How long does it take to learn resin art?
A : You can create your first complete piece in a single session. Getting consistently good results understanding colour ratios, flow, and curing conditions takes around 4-6 guided sessions. With practice, the process becomes very intuitive.
Q: Can I learn resin art without any art background?
A : Absolutely. Resin art doesn't require drawing or painting skills. It relies on understanding material behaviour-how resin flows, how colours interact, how temperature affects curing. These are all learnable and teachable.
Q: Why does my resin stay sticky after curing?
A : The most common cause is incorrect mixing-either the wrong ratio, insufficient mixing time, or contaminated cups. It can also happen if the room temperature is too low during curing. Unfortunately, a sticky cure cannot be fully corrected and the piece usually needs to be redone.
Q : Can kids do resin art?
A : Resin art is recommended for ages 14 and above due to chemical handling requirements and is done under strict guidance. At Creative Jack, we have dedicated Kids Art programs for younger learners using age-appropriate safe materials. Kids under the age of 14 as well as pregnant ladies are not recommended for this course or art in general due to its hazardous nature.
Want to Learn Resin Art the Right Way?
Suggestion: Ready to Create Your First Resin Artwork?
Learning resin art in a structured studio environment removes the guesswork and the expensive mistakes. You work with the right materials from day one, understand safe handling properly, and get real-time feedback on your technique.
Creative Jack's Resin Art Course covers everything from material science basics to creating your own fluid art pieces, coasters and jewellery with certified mentors guiding every step.
Suggestion: Join Creative Jack's hands-on Resin Art Course and learn directly from experienced mentors. Work with professional materials, understand safety practices, and create your own resin coasters, jewellery, and fluid art projects from day one.
Available both at our studio in Mumbai and online.
Chat with our team on WhatsApp: +91 8356065552
Explore More at Creative Jack
Creative Jack - India's Creative Learning Hub. Art and design classes across Mumbai and Pune, for all ages and skill levels.